VOX STYLE Animation Master Prompt
Introduction: The Magic of the “Vox Aesthetic”
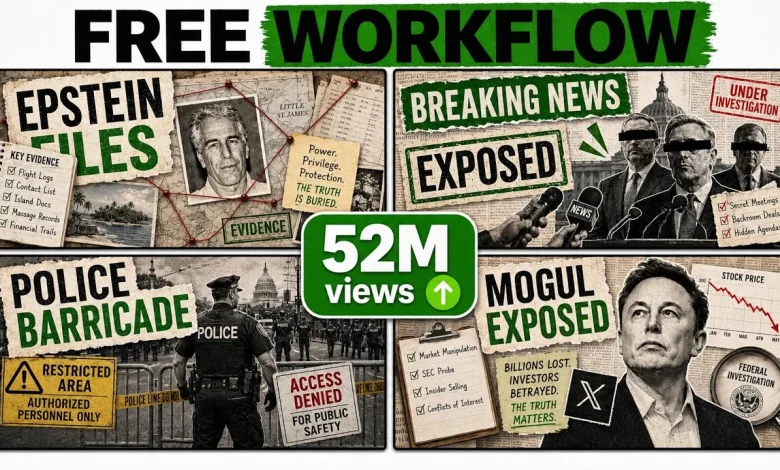
The “Vox-style” animation has become a dominant force in social media storytelling. Defined by its signature layered paper visuals, smooth motion graphics, and a sophisticated documentary feel, this aesthetic can transform complex topics like geopolitical history or true crime into highly engaging, viral content. While these videos appear to be the work of professional studios using expensive software, they are now entirely replicable by anyone with a laptop and an internet connection.
The Opportunity: You can recreate this professional, high-engagement aesthetic using a 100% free AI workflow. No paid subscriptions, high-end hardware, or prior animation experience are required to produce documentary-level content.
Before we move into the technical phase, remember that great visuals are nothing without a great story. Our process begins with setting up the “digital brain” that will guide our production.
Phase 1: Setting Up Your AI Creative Suite
The heart of this workflow is a powerful chatbot that acts as your Director. You have three primary options, each with distinct advantages:
| Chatbot | Key Attribute | Benefit |
| DeepSeek | Open Access | A robust Chinese chatbot that offers high-level performance without paywalls. |
| Claude | Performance | Excellent for high-quality, nuanced writing and understanding complex instructions. |
| ChatGPT | Versatility | The gold standard for general versatility and user-friendly interface. |
The “Master” and “Engine” Prompts
To “teach” the AI how to think like a Vox editor, you must provide it with two specific external documents mentioned in the source material:
- The Master Prompt: This is the foundational instruction set you copy and paste from the source’s Google Doc. It initializes the chatbot and prepares it for the specific Vox workflow.
- The Engine Prompt: This is a crucial 8-page external PDF or Google Drive document. You must download this file and upload it directly to your chatbot. This document contains the “DNA” of the style, including visual rules, storytelling formats, and niche-specific instructions.
Phase 2: Niche Selection and Research-Driven Scripting
Once the Engine Prompt is uploaded, the AI will prompt you to select a niche. The Vox aesthetic is particularly effective for:
- Crime & Documentary
- History
- Money & Power
- Disaster & Survival
- Mysteries & The Unexplained
- Technology
- Sports
The AI Research Process
After selecting a topic (e.g., the disappearance of Flight MH370), the AI performs a deep dive, gathering data from news reports, Reddit forums, YouTube discussions, and Google search results. This ensures your script is backed by documentary-level research. You can specify a duration for your project, from a 30-second viral short to a 60-minute deep-dive documentary.
Phase 3: Visual Storyboarding and “Visual Beats”
A script is merely text until it is broken down into Visual Beats. Think of this as the AI “reading between the lines” of your script to identify exactly where a new visual is needed to keep the audience engaged. For a 30-second script, the AI typically identifies around 14 distinct beats.
Rather than manual entry, the chatbot will provide a .txt file containing all image generation prompts in a batch. This allows for rapid production and ensures a consistent visual style across the entire video.
Phase 4: Automated Image Generation with Google Flow
To turn those prompts into high-quality visuals, we use Google Flow, which provides 50 free credits every 24 hours.
Configuration Checklist (Precision is Key)
- Agent Mode: Toggle to ON.
- Aspect Ratio: 16:9.
- Image Model: “Nano Banana.”
- The Critical Step: You must paste the “Multi-Image Prompt” into the Agent Instructions box, NOT the main prompt box. If you skip this, the automation will fail.
Once configured, paste all 14 prompts from your .txt file into the main box. Agent Mode will automatically generate all scenes, incorporating newspaper textures, archival maps, and bold typography directly into the images. This “baked-in” text is why we keep the final editing clean and simple.
Phase 5: Breathing Life into Visuals (The Animation Phase)
Now, we transform static images into the smooth, sliding motion that defines the genre.
IMPORTANT: You must turn Agent Mode OFF before starting this phase to prevent the AI from trying to automate individual clip animations incorrectly.
Video Configuration & Logic
- Switch to Video Mode: Use the Omniflash model.
- Timing (The Pro-Tip): Set your duration to 6 seconds. Even though the Chatbot naturally generates 10-second instructions, setting the tool to 6 seconds is the “sweet spot” to conserve your free credits while maintaining high visual impact.
- The Timing Prompt: Use the “Timing Prompt” from your source doc to rewrite the Universal Animation Prompt specifically for a 6-second output.
- The Drag-and-Paste Workflow: Drag an image into the timeline, paste your 6-second Universal Animation Prompt, and click send. Repeat this for all 14 scenes.
Note for Free Users: Free Google Flow accounts are limited to 720p downloads. Do not worry—we will upscale these to 1080p or 4K during the final assembly in CapCut.
Phase 6: Professional Voiceovers and Audio Design
A documentary is only as authoritative as its narrator.
- Tools: ElevenLabs is the industry standard, but Noise AI is an excellent free alternative providing 2,000 daily credits.
- V3 Voice Model: Use this model to access Performance Keywords. By adding tags like
[Whisper]or[Mysterious]to your script, you can dramatically shift the emotional weight of the narration. - Atmosphere: Use Suno AI to generate a custom, royalty-free background track that matches the tension of your story.
Phase 7: Final Assembly in CapCut
The final stage is where the “paper” visuals and the voice finally meet.
The “Anchor” Workflow
In documentary filmmaking, the Voiceover is the anchor. Import your assets and place the audio on the timeline first. The pacing of the visuals must be dictated by the narration, not the other way around.
- The Speed Match Trick: If your 14 animated clips (totaling 84 seconds) are longer than your 30-second voiceover, select all clips on the timeline, go to Speed Settings, and increase the speed until the end of the footage aligns perfectly with the end of the audio.
- Less is More: Resist the urge to add heavy captions. Since your AI-generated images already contain maps, newspaper headlines, and labels, extra text will make the screen feel cluttered.
- Final Export: Export at 1080p or use CapCut’s 4K upscaling to polish the 720p clips generated in the free tier.
Master Prompt: VOX STYLE Animation